
I've watched a Korean variety show where celebrity artistes take on the challenge to be cooks at restaurants in other countries. One of the dishes they made was Kimchi Pancake and it was a hit with the locals.
It seemed rather easy to make so I attempted to try making this in my own kitchen.
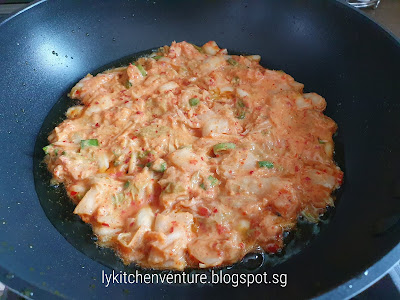
The ingredients I'm using is simple based on what I have in my refridgerator and kitchen pantry. Mix them all up, send them onto the frying pan and VIOLA!! It's done!
The pancake was really quick and easy to make. It's a little spicy (depending on your tolerance level for spiciness), a little sweet, sour and salty. The crispiness on the outside of the pacncake is from the oil when frying...so do be generous with the oil.
This not only make for a great side dish and snack, but is also great on its own as a meal. This is best served hot and especially enjoyabe on a cool day. I can have this for my lunch anytime!!

Kimchi Pancake (Kimchijeon)
makes 3 pancakes in a 7 inch frying pan
Ingredients
500g kimchi, cut into smaller slices
Ingredients
500g kimchi, cut into smaller slices
2 tbspn sauce from kimchi packet
4 spring onions, chopped
4 spring onions, chopped
1/2 tsp sugar
90g plain flour
115g water
Cooking oil (about 4 - 5 tbspn)

Method
1. Place kimchi, kimchi sauce, chopped spring onions into a big mixing bowl. (I didn't bother to scoop out 2 tbspn kimchi sauce as I emptied the whole pack of 500g kimchi)

2. Add in sugar, flour and water and mix well with a spoon.

2. Add in sugar, flour and water and mix well with a spoon.


3. Heat up about 2 tbspn cooking oil in a non-sick frying pan.
4. Scoop one third of the kimchi batter onto the frying pan and spread it out onto the pan with the back of a spoon.


5. Let it cook for about 4-5 minutes, until the bottom of the pancake turns golden brown and crisp.

6. Flip the pancake and add in another 2-3 tbspn oil around the edges of the pancake. Lift the sides of the pancake ad tilt the frying pan to allow the oil to flow and spread evenly beneath the pancake.
7. Let it cook for another 4-5 minutes until the bottom of the pancake is golden brown and crisp.

7. Let it cook for another 4-5 minutes until the bottom of the pancake is golden brown and crisp.
8. Flip the pancake again and let it cook for a minute.
9. Slide pancake onto a serving plate and continue to cook the next batch of pancake.

10. Pancake is best served warm.

10. Pancake is best served warm.
11. Enjoy!!
Thanks for dropping by. Do link back to LY's Kitchen Ventures if you have used any information published in this blog.

No comments:
Post a Comment