
This is another loaf bread that was very popular a while back. Finally found some time to bake a loaf and I'm super happy to see giraffe patches in my bread!!
Here's presenting my Giraffe Patches Bread Loaf!

Aren't they cute?
Here's presenting my Giraffe Patches Bread Loaf!


"Now I don't have to go to the zoo to see giraffe patches!" says my girl...LOL!!

250g cold milk
375g bread flour
35g sugar
1/2 tsp salt
375g bread flour
35g sugar
1/2 tsp salt
1 tsp instant yeast
20g unsalted butter
20g cocoa powder
15g cold milk (I use 20g)
20g cocoa powder
15g cold milk (I use 20g)
Method:
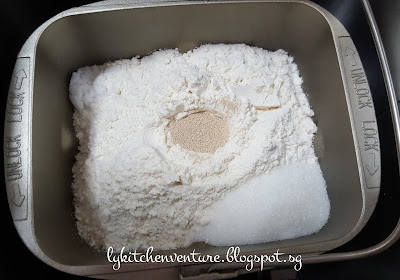
1. Place all ingredients (milk, bread flour, sugar, salt, yeast) into the pan except butter based on the
sequence listed above or by following your breadmaker manufacturers'
instructions regarding the order of liquid/dry ingredients.
(I'm using Zojirushi breadmaker. I placed all the wet ingredients first,
followed by the dry ingredients. Make a dent at the centre of the flour
and pour the yeast in the dent last, making sure the yeast does not
touch the liquid, sugar and salt.)

2. Make the selection for 'Pasta Dough' setting on your breadmaker.
(For my Zojirushi breadmaker, I chose the 'Cookie/Pasta Dough')

3. Press start and the machine will start kneading the dough. The
machine will beep after a few minutes. Press start to continue kneading.
4. After the machine has finished its course of kneading under 'Pasta Dough' setting, make the selection for 'Dough' setting.

5. Press start and the machine will start kneading the dough after resting for 15 minutes. Add in the butter during this resting stage.

6. Let the breadmaker do the rest.
7. When the bread dough is proofed, the machine will beep to signal the
end of the 'Dough' function.


8. Remove 250g plain dough and place in a lightly greased bowl. Cover with plastic cling wrap and proof for an hour.

9. Add in cocoa powder and milk to the remaining dough in the breadmaker and press the selection for 'Pasta Dough'. When the course of kneading has completed, power off the breadmaker and allow the chocolate dough to proof with lid covered for 1 hour.


10. When the dough has doubled in size after 1 hour, divide the plain dough into 1 portion of 85g (large) and 3 portions of 55g (small) each. For the chocolate dough, divide into 1 portion of 130g (large) and 3 portions of 110g (small) each. (depend on final weight of the dough and adjust according)


11. Using a rolling pin, roll the chocolate dough to a flat oval shape, then roll it lengthwise like a swiss roll. (I use my hand to flatten the dough)


12. Using a rolling pin, roll the plain dough to a flat oval shape. Place the swiss rolled chocolate dough on it. Cover the chocolate dough with the plain dough and pinch the edges to seal. (I use my hand to flatten the dough)


12. Using a rolling pin, roll the plain dough to a flat oval shape. Place the swiss rolled chocolate dough on it. Cover the chocolate dough with the plain dough and pinch the edges to seal. (I use my hand to flatten the dough)


13. Gently roll them into 24cm long log. Repeat till all finished.

14. Cut each log into 2 portions.

15. First stack 3 small small dough in the prepared loaf pan, followed by 2 large dough and then topped with the balance 3 small dough. (I use a pullman tin. My pullman tin is San Neng brand SN2052, 196 x 106 x 110mm)

15. First stack 3 small small dough in the prepared loaf pan, followed by 2 large dough and then topped with the balance 3 small dough. (I use a pullman tin. My pullman tin is San Neng brand SN2052, 196 x 106 x 110mm)


16. Set aside to proof for another 30-45 minutes.
17. Bake in preheated oven at 180C for 35 minutes.
18. When done, remove from the oven and unmould immediately. Let it cool completely on a wire rack before cutting.


Note:
Original recipe uses mixer to knead the bread dough. I've adapted the recipe to use breadmaker for kneading, then baking in oven in a pullman tin.

This is fabulous, thank you for sharing
ReplyDelete